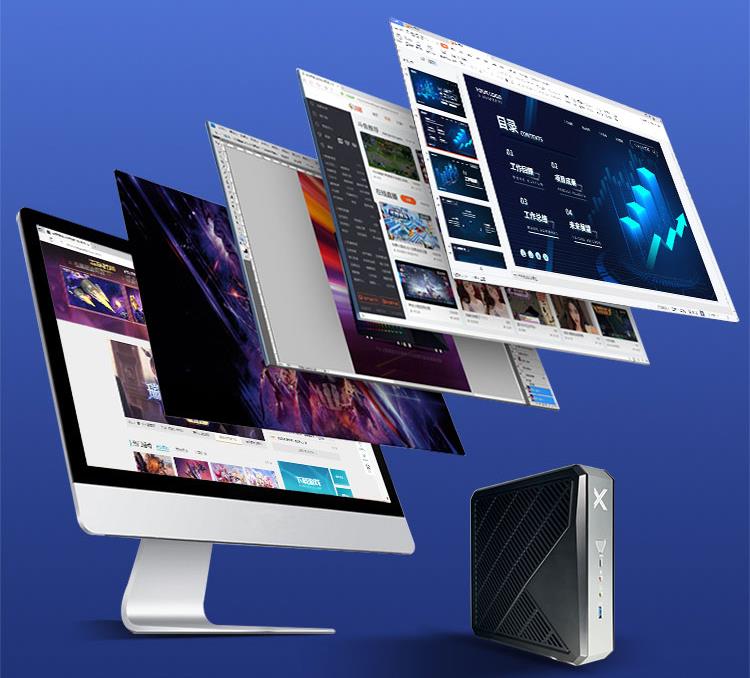
One Device, Dual Functions – A Projector and a Com...
The U9000 handheld PDA combines advanced barcode s...
From the unknown so simpleUsed for mobile phones, ...
The EGPU Graphics Card Expansion Dock is a high-pe...
Full SpecificationsModelHotus ST13‑JOSWindows 10 P...
The N60 PDA is a cutting-edge device for inventory...
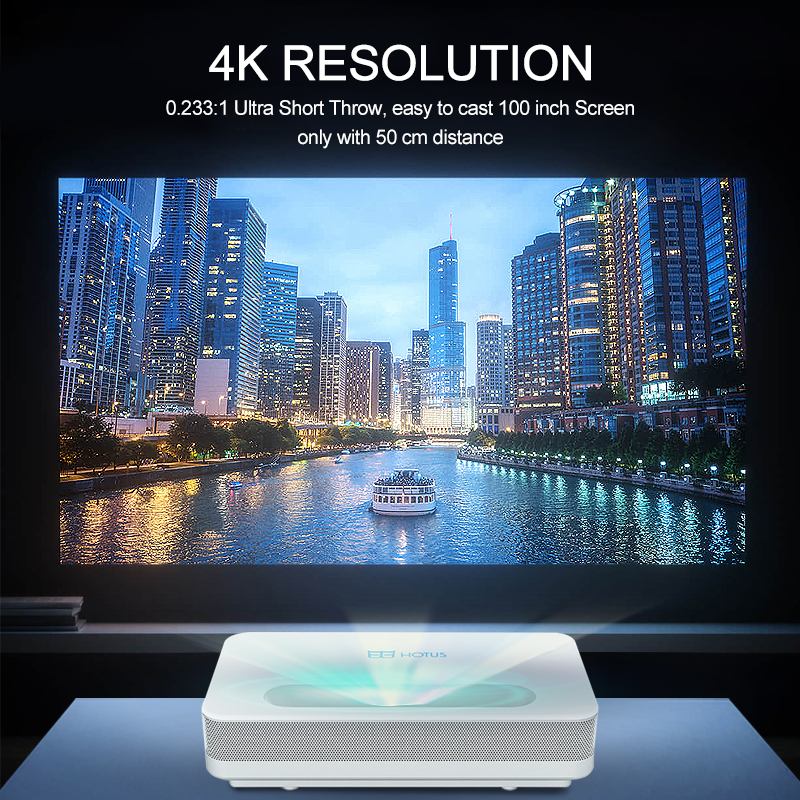
Choosing the right projection method optimizes your viewing experience and installation flexibility. Learn the pros, cons, and best use cases for front, rear, and side projection.
Selecting the ideal projection setup is essential for both image quality and installation convenience. Front projection, rear projection, and side projection each offer distinct advantages. Understanding their differences will help you choose the best solution for your home theater, office, or commercial display.

Front projection is the most common method, used in home theaters, business presentations, and classrooms. The projector sits in front of the screen, casting light directly onto the display surface.

Rear projection uses a translucent screen with the projector placed behind it. Light passes through the screen, creating an image visible to the audience. This method is ideal for exhibitions, stage performances, and control rooms.

Side projection involves positioning the projector at an angle instead of directly in front or behind the screen. This setup is useful for installations where conventional placement isn’t feasible, such as art exhibitions or immersive environments.

Each projection method has its strengths and ideal use cases. The best choice depends on your space constraints, viewing requirements, image quality expectations, and budget. With modern advancements — automatic keystone correction, short‑throw optics, and high brightness — today’s projectors adapt to diverse environments while delivering outstanding visuals.
Ready to Find Your Perfect Projection Setup?
Whether you need front, rear, or side projection, selecting the right projector makes all the difference. Explore our range of DLP projectors designed for flexible installation, high brightness, and exceptional image quality.