- Select Language
The N60 PDA is a cutting-edge device for inventory...
Properly setting up a DLP projector is crucial for optimal image quality and performance. An improperly installed or uncalibrated projector can cause image distortion, washed-out colors, and eye strain. This article guides you through the key steps—mounting location, throw ratio, keystone correction, and color calibration—to help you enjoy a flawless projection experience.

1. Choosing a Mounting Location
The projector's mounting location determines image size, clarity, and comfort.
Ceiling Mount: Ideal for fixed installations in home theaters, classrooms, or conference rooms. Keep the projector out of the way and aligned with the screen.
Tabletop Placement: Best for portable or temporary installations. Easy to move and adjust.
Rear Projection: Ideal for trade shows or special installations where the projector is hidden behind the screen.
Tip: Ensure the projector lens is horizontally aligned with the center of the screen to minimize distortion.
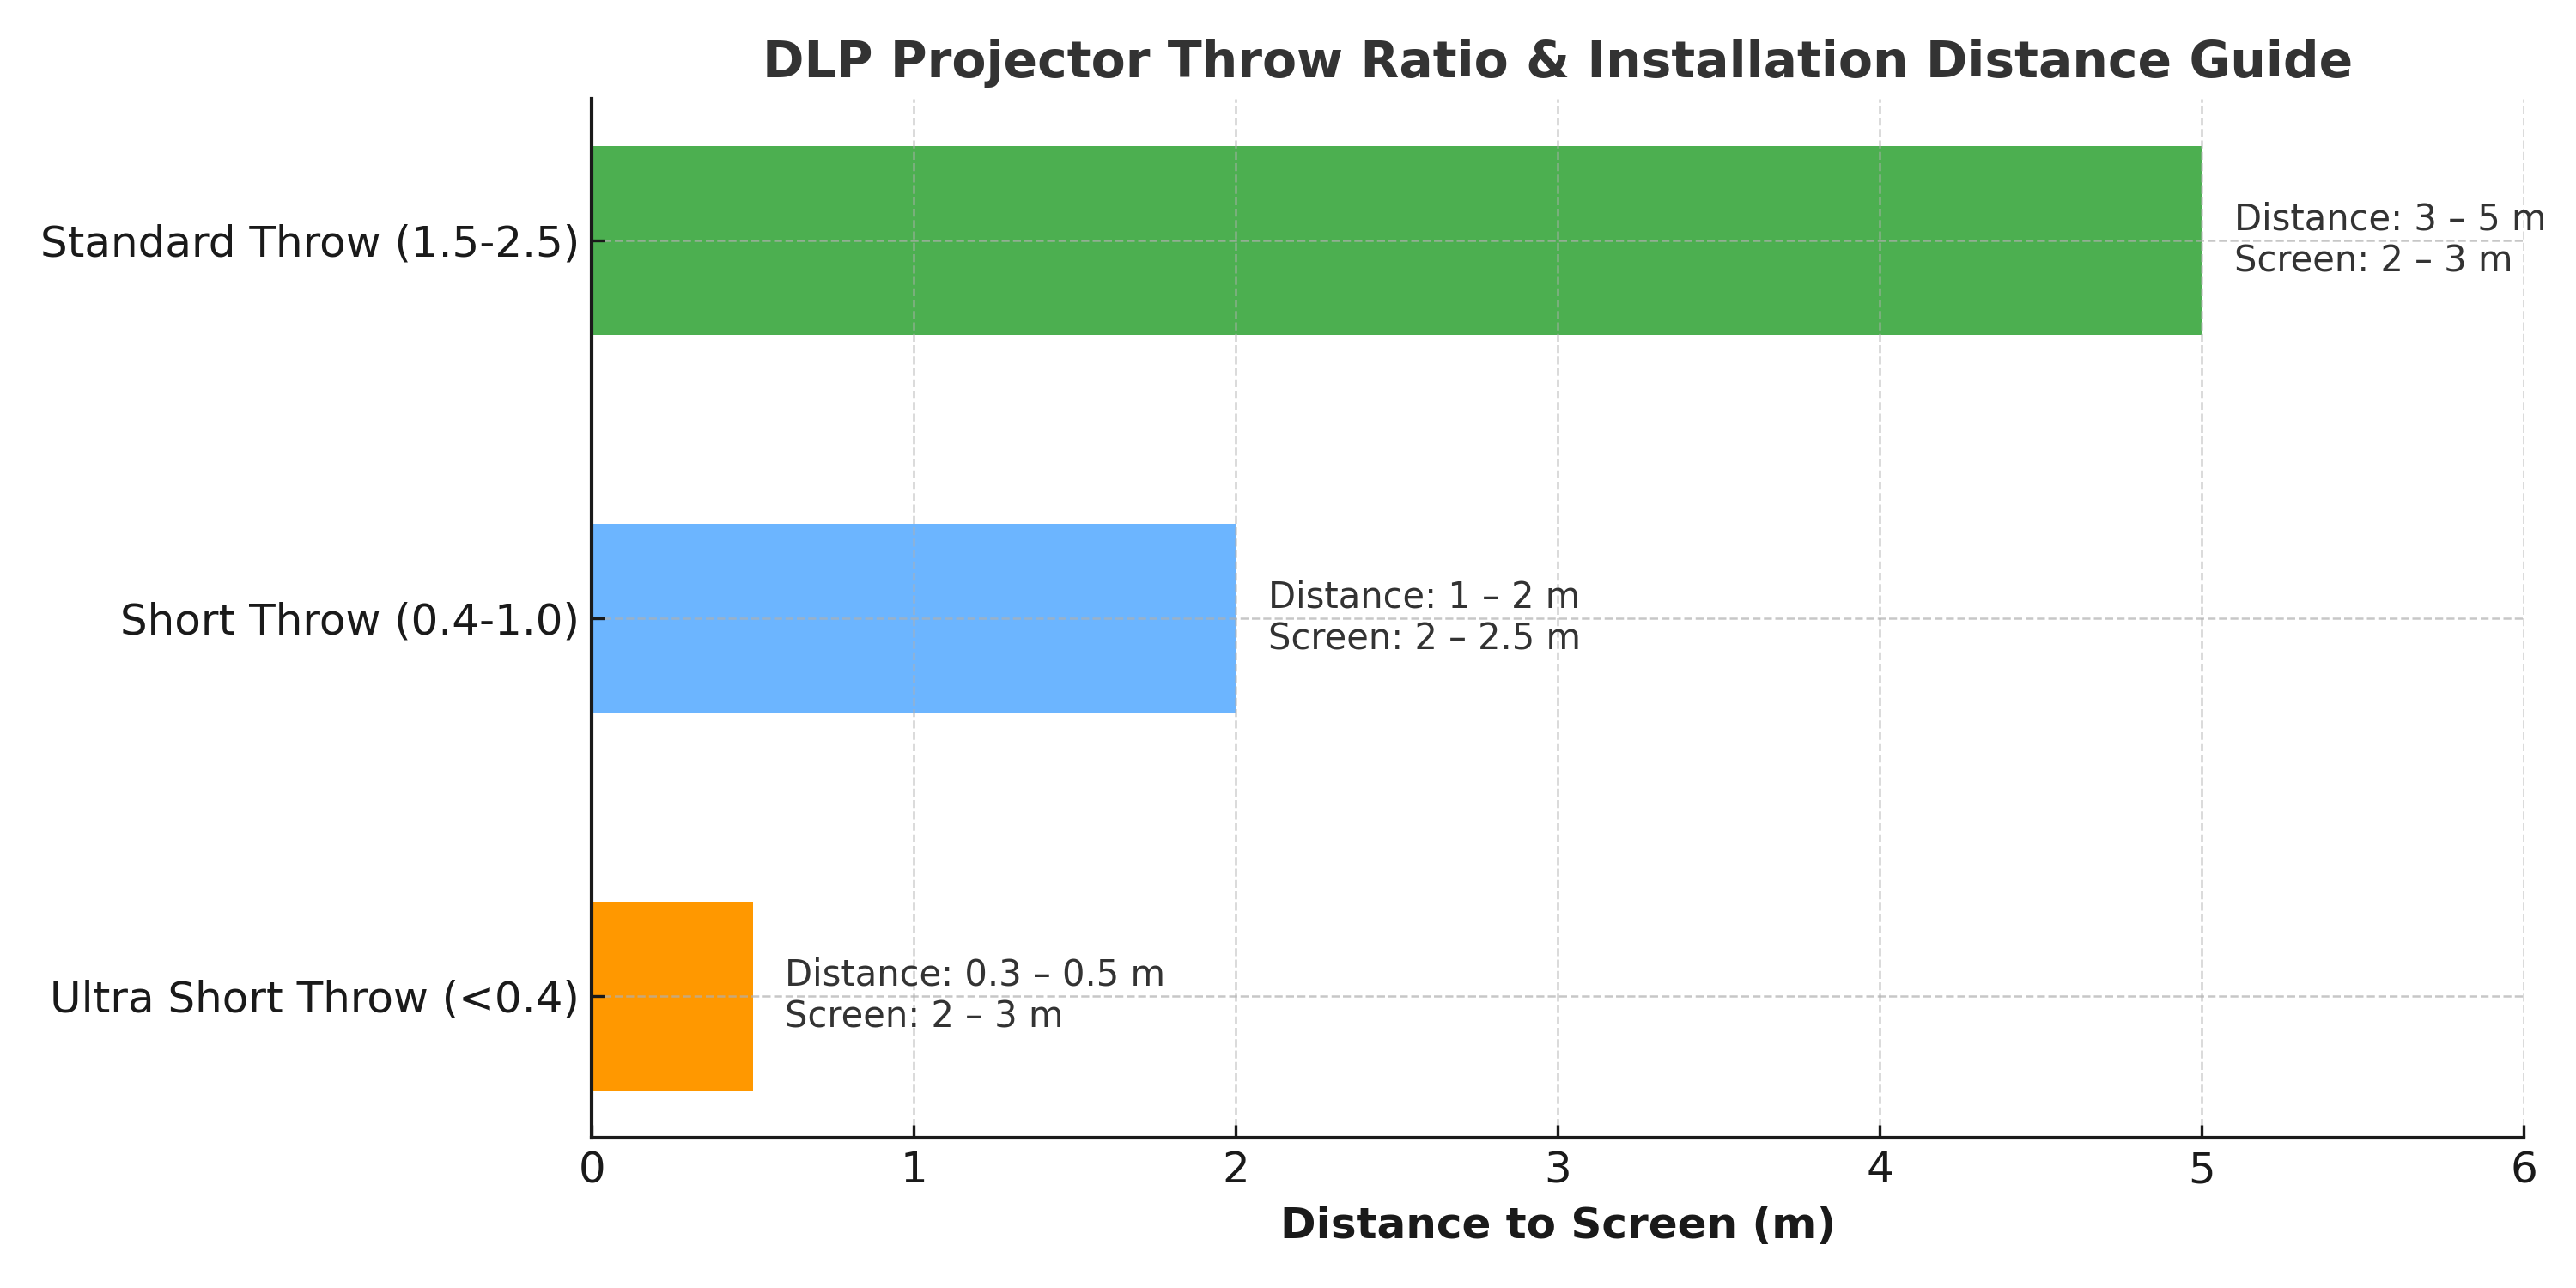
2. Understanding the Throw Ratio: The throw ratio defines how far the projector needs to be from the screen to project a specific image size. Formula: Throw ratio = distance from the screen ÷ screen width
Short throw ratio (0.4–1.0): Projects a large image at a short distance; ideal for small rooms.
Standard throw ratio (1.5–2.5): Commonly used in home theaters and offices.
Ultra-short throw ratio (<0.4): Can be placed very close to the screen, ideal for interactive whiteboards and small spaces.
Check your projector's manual for its specific throw ratio so you can accurately plan your installation distance.

3. Keystone Correction
Even slight misalignment can cause the image to appear trapezoidal. Keystone correction digitally adjusts the image to restore it to a perfectly rectangular shape.
Vertical keystone correction: Corrects top or bottom tilt.
Horizontal keystone correction: Corrects left or right tilt.
Auto keystone correction: Many modern DLP projectors offer this feature for instant correction.
Note: While digital keystone correction is convenient, it can slightly degrade image quality. Whenever possible, adjust the projector's physical position first.
4. Color Calibration
To maximize your projector's capabilities, calibrate its color for accurate color reproduction.
Brightness and Contrast: Adjust brightness and contrast to make dark areas clear without losing detail in bright scenes.
Color Temperature: A setting of 6500K is considered the "cinema standard" for natural tones.
Color Saturation: Ensure colors are vivid but not overly saturated.
Advanced Calibration: Perform professional-grade adjustments using test patterns and calibration tools.
Many DLP projectors come with preset modes (cinema, presentation, gaming, etc.). Start with the mode that most closely matches your intended use and fine-tune from there.

Conclusion
A well-installed and calibrated DLP projector delivers clear, vivid, and immersive visuals. By paying attention to positioning, throw ratio, keystone correction, and color settings, you can ensure optimal performance from your projector—whether for home theater, business, or education.
Ready to create the perfect projection setup?
Our team can guide you in selecting the right projector, determining the ideal installation layout, and fine-tuning the image to your space. Contact us today for expert advice, installation support, and special deals on the latest DLP projectors.