I have walked into enough meeting rooms to know that most video conferencing problems are not software problems. They are installation problems — a host wedged into a cabinet where it overheats, a control device out of reach, cables routed the wrong way. The hardware itself is rarely at fault. This guide covers the installation of a two-device room setup: a Palm-sized Mini PC as the conference host and an SH6 rugged handheld tablet as the room control panel. Follow the order below and the room will work the first time the team tries to dial in.
What to Check Before You Mount Anything
Before touching the hardware, confirm three things about the room. First, the display: the screen the meeting runs on needs an HDMI input and should be mounted where everyone at the table can see it. Second, the network: a wired connection is strongly preferred for the host, so note where the Ethernet point is in relation to the display. Third, the power: count the outlets near the display and the door, because the host and the control panel each need a socket, and you do not want to discover a missing outlet after the mount is finished.
It is also worth checking what conferencing platform the organisation uses, because the deployment differs slightly between a Teams room, a Zoom Room, and a WebRTC browser-based setup. The hardware is the same; the account and device configuration is what changes. Most organisations standardise on one platform, and the setup below assumes a single platform for the whole fleet. Our video conferencing solutions page covers the platform-specific details.
⚙️ Mounting the Host Behind the Display
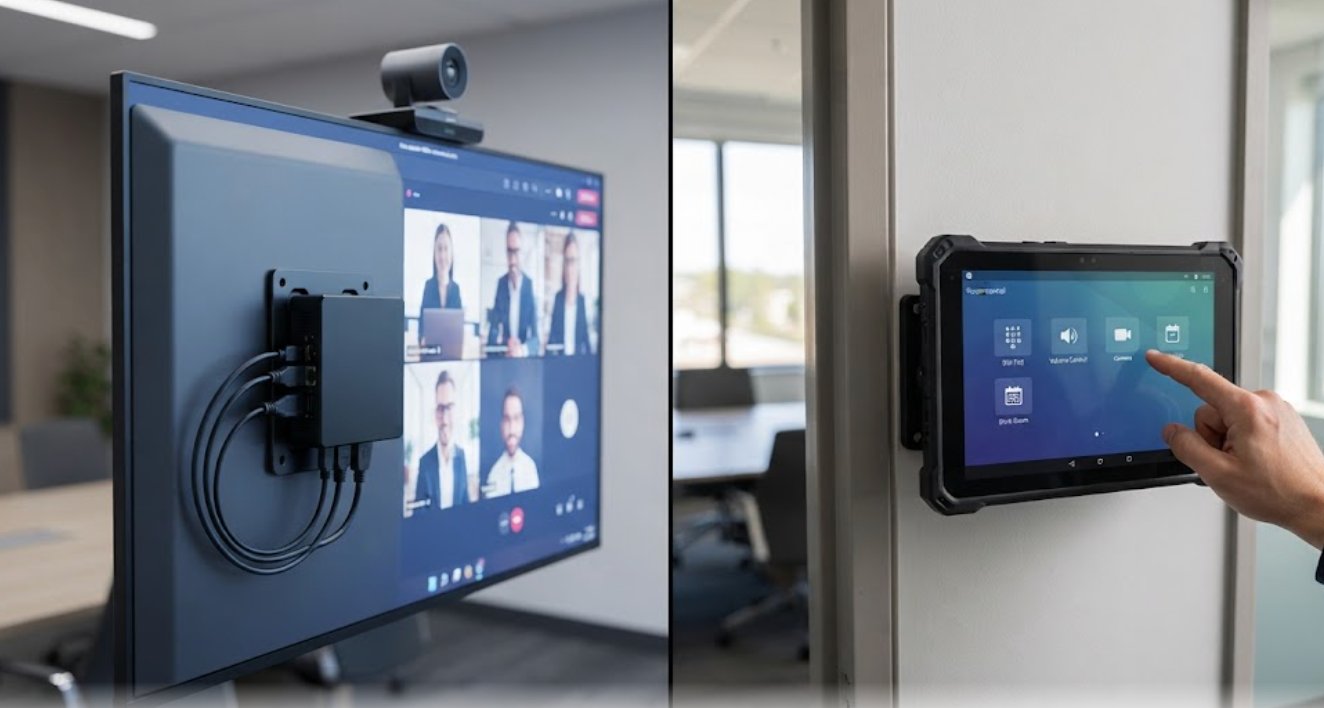
The Palm-sized Mini PC is small enough to mount behind the display panel or on the wall bracket, which is exactly where a conference host belongs. Fix the unit with the VESA mount or the included bracket, keeping the vents facing outward and clear of the wall. A host that sits inside a closed cabinet behind a screen is a host that will throttle after twenty minutes of a busy meeting, so leave at least five centimetres of air space behind the unit.
Connect the HDMI cable from the display to the host, then attach the wired network cable and the power supply. The Palm-sized Mini PC draws very little power, so a standard outlet is fine, but it must be a socket that stays live — not one controlled by a light switch, or the room will come back dead after someone turns the lights off. Once connected, boot the host and run the initial Windows setup before moving on to the control panel.
🚪 Putting the Control Tablet by the Door
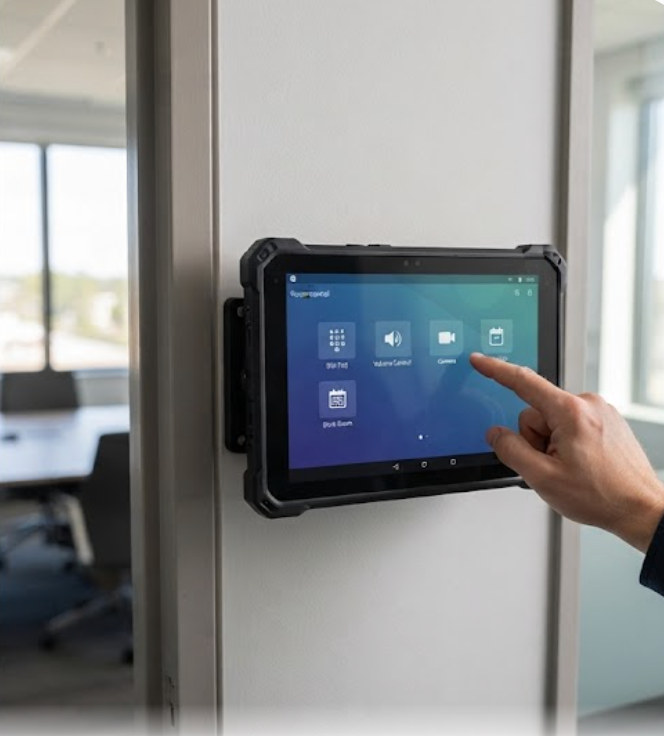
The SH6 is the part of the installation most rooms get wrong. Instead of burying the control device in a drawer, mount the SH6 at the door side of the table, where the first person who enters can reach it. The SH6 is a rugged 6.5-inch Windows tablet, so it can run the same room-control app as the host — dial, camera, volume, and room booking display — without needing a separate proprietary controller.
The SH6 connects to the room over Wi-Fi and talks to the host over the local network. Mount it on a wall cradle near the door or leave it on the table stand, and make sure it is on the same subnet as the host. Because the SH6 is rugged and sealed, it survives being grabbed, knocked, and left on the table overnight, which is more than can be said for a consumer tablet pressed into service as a room controller.
🔋 Network, Power, and Cable Routing
This is the step where installations usually fail. The host should use the wired network, not Wi-Fi, because a dropped connection in the middle of an executive meeting is the failure that gets the IT team blamed. The SH6, by contrast, is fine on Wi-Fi because it only sends control commands, not media. If the room has a dedicated VLAN for conferencing devices, put the host and the SH6 in it and make sure the conferencing platform's ports are open on the firewall.
For cable routing, run the HDMI and Ethernet along the wall bracket to the back of the display and secure them with clips so they do not dangle. Label both ends of each cable — it saves the next technician twenty minutes. Keep the power supplies accessible rather than hidden behind the mount, because power supplies are the first thing a technician wants to check when a room goes dark.
A Short Installation Test Checklist
| Check | Expected Result |
|---|---|
| Host boots to Windows | Desktop loads within a minute, no throttling after warm-up |
| Display shows host output | HDMI signal stable, no flicker |
| SH6 pairs with host | Room control app shows host online |
| Dial-out test | Two-way audio and video confirmed |
| Camera control | Pan, tilt, and zoom respond from the SH6 |
| Power-cycle test | Both devices return to a ready state after a full power off |
Run the checklist after every install and after any room change. The power-cycle test is the one most people skip, and it is the one that catches the light-switch-controlled outlet and the misconfigured auto-start. If the room does not come back ready after a reboot, fix it before the meeting schedule depends on it.
Common Installation Mistakes and Fixes
Three mistakes cover most call-backs. First, the host mounted with its vents blocked — the fix is to re-mount with clearance or add a USB fan. Second, the SH6 placed out of reach, so people use their laptops instead and the room control app is never used — the fix is to mount it where it is the obvious option. Third, the host on Wi-Fi despite a wired point being available — the fix is to run the cable before the room goes live, not after the first dropped call. Each of these is a ten-minute fix at install time and an hour of disruption if left until it fails.
Document the room: a one-page sheet with the host name, the SH6 name, the VLAN, and the platform account is enough. Tape it inside the cabinet. The next person who touches that room — in six months or six years — will thank the installer who left it.
Ready for Your Room
A video conferencing room built this way takes about two hours to install and, if the checklist is run, needs almost no call-backs. The rugged mini PC solutions overview has the full host range, and the product pages for the Palm-sized Mini PC and the SH6 carry the full specifications. If you are rolling out several rooms, we can help you standardise the mount kit, the cable set, and the room control app so every room installs the same way.