A clinic is not one room with one computer; it is three zones with different cleaning rules, different mounting needs, and different users. The reception desk needs a device that stays put and survives constant handling. The consultation room needs a screen the clinician can read while a patient sits across the desk. The corridor between rooms needs a handheld that follows a nurse on rounds without being dropped into a sink. Each zone changes how a device is mounted, charged, and cleaned, which is why a clinic tablet rollout succeeds or fails at installation rather than at purchase. This guide walks the three zones in order and matches each one to a Hotus device: the SH6 for the handheld rounds, the HTQ10A for the consultation room, and the RT81 for the front desk. The same medical workstation endpoint plan applies whether the site is a two-doctor clinic or a hospital department.
⚙️ Mapping the Three Zones Before Mounting Anything
The first installation step is not mounting; it is mapping. Walk the clinic and write down where each device will actually be used, how long it stays in one place, and what gets sprayed on it between patients. A front-desk tablet that logs patients for eight hours has different mounting and power needs than a consultation tablet that is used in ten-minute bursts, and both differ from a rounds handheld that is rarely at rest. Drawing the zone map first prevents the most common installation mistake, which is mounting every device the same way and discovering later that two zones need opposite treatment. The zone map also fixes the cleaning protocol for each device before the first day of use, which matters more in a clinic than in any other deployment.
Reception Desk: A Fixed Unit for Sign-In
The reception zone is fixed, high-touch, and visible to every patient who walks in. The RT81 belongs here because a 4G tablet with a larger screen handles the registration and check-in tasks comfortably, and a fixed mounting keeps it from walking off the desk. Install the RT81 on a swing-arm mount so the receptionist can angle the screen toward a patient for signature capture and swing it back for the next task. Route the charging cable through the mount arm so the device stays powered all day without a loose cable across the desk, and add a short, clean power run that does not cross the patient path. Because the reception desk sees the most hands, install a screen protector at the same time as the mount; replacing a scratched screen later costs more than the protector.
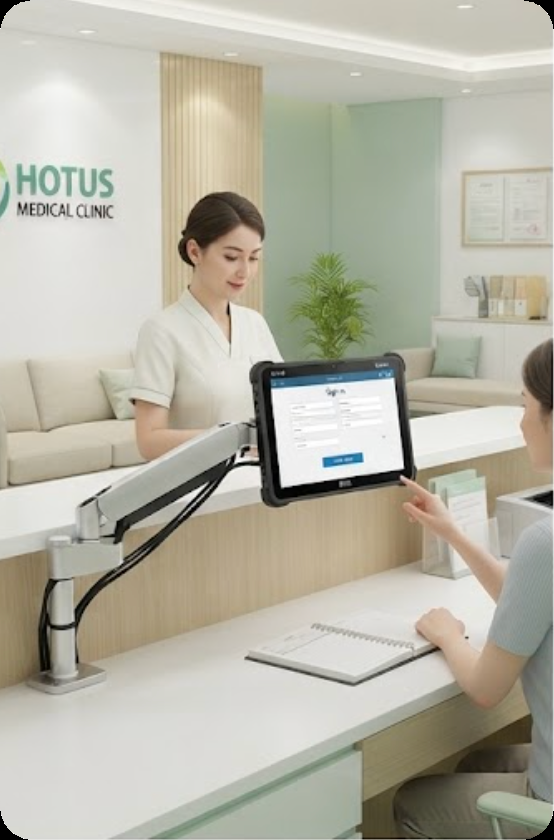
The reception mounting above keeps the RT81 fixed, powered, and angled toward the patient for signature capture. The cable runs through the mount arm, which removes the loose-cable hazard that a busy desk does not need.
🖥️ Consultation Room: A Screen the Clinician Controls
The consultation room places the device on the clinician's side of the desk, which changes both the mounting and the screen angle. The HTQ10A, with its Android platform and clean display, suits the chart review and note-taking rhythm of a consultation. Mount it on a desk arm that lets the clinician pull the screen closer for reading and push it back when the patient needs the desk surface. Position the screen so the patient can see it only when the clinician chooses to share it, which protects the privacy of the chart on the screen. Install the HTQ10A with a foot pedal or a short-reach power option so the clinician is not leaning across the desk to charge it between patients.
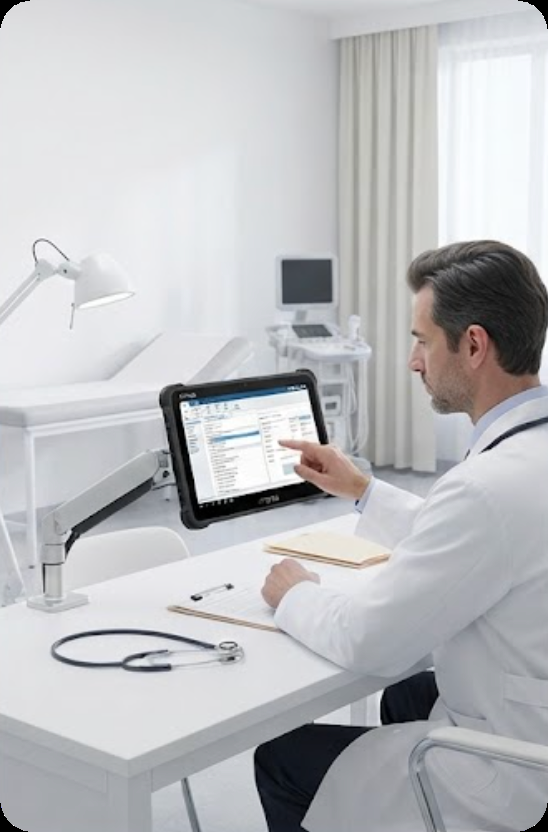
The consultation mounting above keeps the HTQ10A within the clinician's reach without turning the desk into a cable tangle. A pull-close, push-back arm supports the short, focused sessions that a consultation room runs all day.
Rounds in the Corridor: A Handheld That Follows
The third zone is not a desk at all. The rounds handheld follows a nurse from room to room, and its installation is about workflow rather than mounting: a charging dock at the nurses' station, a secure holster, and a cleaning routine that survives the corridor. The SH6 fits this role because its compact rugged body survives the drops and splashes a handheld meets on rounds. Install a multi-slot charging dock at the nurses' station so every shift starts with a full fleet, and add a holster to each unit so a nurse can carry it hands-free between rooms. The cleaning step for the SH6 is the one that needs agreement before rollout, because a handheld that is sprayed between every patient has to tolerate the same disinfectant as the mounted devices.
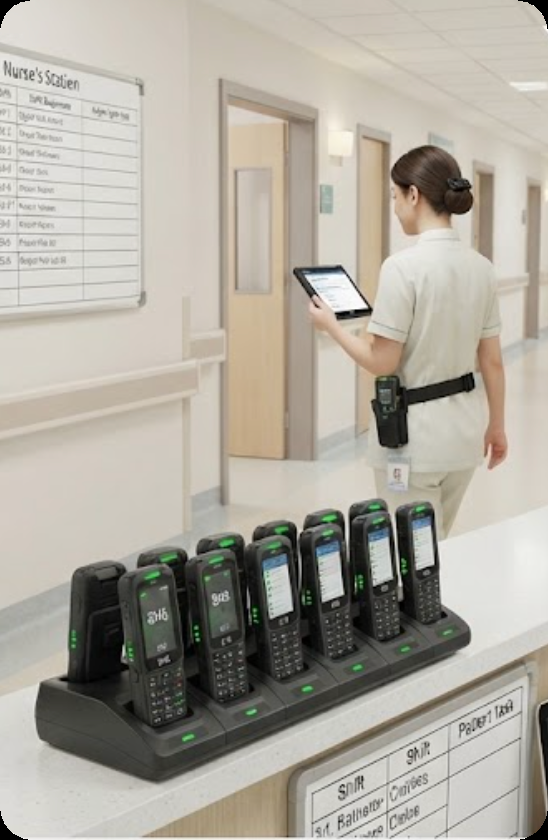
The rounds setup above shows the SH6 in its natural installation: a full-charge dock at the nurses' station and a holster that keeps the device with the nurse between rooms. The handheld zone is about workflow and charging rhythm rather than mounting hardware.
🔧 Cleaning Rules That Hold Across the Zones
Cleaning is the installation detail that most clinic rollouts underestimate. The same disinfectant wipes that clean the front desk will be used on the consultation screen and on the rounds handheld, and every device has to tolerate that protocol for years. Confirm the cleaning agent with the device specification before rollout, and apply the same rule in all three zones so the staff does not have to remember which cleaner goes where. Wipe-mounted devices in place, but remove the handheld from its holster before cleaning so no cleaner pools in the seams. Installing a consistent cleaning protocol at the same time as the hardware prevents the slow damage that appears months later as a hazy screen or a degraded port.
🔋 Power and Network Checklist for the Floor
Before the first patient day, run the floor-wide checklist once. Confirm Wi-Fi coverage reaches the consultation rooms and the corridor, not just the reception desk, because a rounds handheld that loses its session between rooms defeats the rollout. Verify that the charging dock at the nurses' station has a dedicated circuit and that the reception and consultation mounts have power runs that do not share a tripping outlet. Assign each device a static identity on the network so the clinic's systems address the same tablet every day, and document the credentials in the handover folder. A half-day of checklist work at installation saves weeks of mid-day troubleshooting once the clinic is live.
| Zone | Device | Mounting | Charging | Cleaning |
|---|---|---|---|---|
| Reception | RT81 | Swing-arm mount | Cable through mount arm | Wipe in place; screen protector |
| Consultation | HTQ10A | Desk arm, clinician side | Short-reach power | Wipe screen; keep patient view controlled |
| Corridor rounds | SH6 | Holster | Multi-slot dock at station | Remove from holster before cleaning |
The table condenses the whole installation into one view: each zone pairs a device with a mounting style, a charging path, and a cleaning rule. Following the row for each zone in order is the fastest way to a rollout that survives contact with a real clinic.
💰 Rolling the Deployment Out Zone by Zone
Roll the installation out in the same order as the zone map, one zone at a time, rather than mounting every device on the same day. Start with the reception RT81 and run it for a week, because the front desk is where registration errors show first and where the staff can give the fastest feedback. Add the consultation HTQ10A next, once the reception rhythm is stable, and finish with the rounds SH6 so the dock and holster workflow is introduced to nurses who already trust the system. Phasing the rollout keeps the failure surface small, lets each zone's staff become the trainer for the next zone, and avoids a single-day install that overwhelms everyone at once. The full rugged handheld tablets range covers the mounting and accessory options for each zone, and the related clinic tablet deployment guide shows the same phased method applied to a different device mix.